The Ultimate Laravel 8 Guide for Beginners | Create your First To-Do App

. . .
Hi! I'm happy to see you here :) In this blog, we will take you on a journey under the hood of web technologies, offering you a glimpse of all the bits and pieces that need to come together to make the web work as we know it.
As with all unknown things, this is going to be an adventure - but no worries, since you already worked up the courage to be here, you'll be just fine. :)
What we will be considering?
In this course, we will learn how to install Laravel and understand all the necessary concepts. Once we've finished the course, we will have a small working web application: To-Do App, with an easy way to host it for free, so others will see your work!
It will (more or less) look like this:

Why choose Laravel and why we use it?
Laravel is elegant, expressive and flexible PHP framework with extreme focus on clean code and speed which describes itself as “The PHP framework for web artisans”. It is a free and Open source PHP framework created by Taylor Otwell, based on Model View Controller (MVC) architecture.
Creating a web application from scratch can be daunting specially if you are beginner. A simple web application also contains various small and big pieces and creating those pieces every time you are creating a web app can be boring and repetitive and there is no point in reinventing wheels. That’s when Laravel comes to your rescue.

Laravel framework provides various PHP libraries and helper functions and can help you to focus on more important pieces while providing common functions and logic to speed up the development time and ease up the development.
Initially there is a bit of learning curve specially if you are a beginner and have no experience with any kind of web framework. But believe me, once you flow with it, you will not only love, you will become addicted to it. Laravel aims at creativity in development. It uses the word ‘Web Artisan’ to point out the creative hidden inside the developer’s heart.
Result => Efficient Application with fewer lines and well designed code.
To make it easier for you to learn, I wrote this laravel tutorial with beginner audience in mind. Thus you will find it easy to follow this tutorial for laravel to learn.
What you should know prior to using our Laravel tutorial?
-
HTML/CSS (Duh!)
-
Basic understanding of core PHP
-
Intermediate PHP – This is sort of optional but if you have time, do learn some intermediate concepts like PHP OOP, abstraction etc.
-
Basic Understanding of MVC Framework
-
Perseverance – Even though it’s easy to learn Laravel, it will test your patience at various interval. At least I had some roadblocks because I knew PHP but I had no knowledge about frameworks. Even while learning the framework, or successfully completing projects, I was having confusion in the basic underlying concepts of the MVC Framework. But I didn’t give up.
-
Passion – C’mon Web development is fun! At least Laravel made it enjoyable. It’s best to enjoy the learning journey.
Building Simple CRUD To-do Application in Laravel
Best way to learn programming is to practice. Thus, here we will be learning basic concepts of Laravel by developing a simple To-Do Laravel Web App which will do below functions with the help of this laravel tutorial.
-
You can register and login to the web app
-
You can add tasks to your to-do list
-
You can edit as well as delete those tasks
-
Your list is only visible to you thus it implements authentication using email id and password
. . .
Steps to create your first Laravel Application
1. Install and set up Laravel
Steps for Mac users (Click Here)
1. Make sure brew is installed.
2. Install Composer using below command (If you had composer already installed and setup, ignore this) :
brew install composer
3. Run `composer` to verify whether it installed successfully globally or not as shown below.

4. Now, install Laravel Installer [which is a nifty CLI tool to create new laravel projects with lots of configuration options!] using below command:
composer global require “laravel/installer”
5. Now execute below command to place Composer/vendor/bin directory to $PATH variable (If you had composer already installed and setup, ignore this)
echo 'export PATH="$PATH:$HOME/.composer/vendor/bin"' >> ~/.zshrc
6. Once installed, you can create project simply by
1. Going to desired folder
2. Execute - laravel new projectname
Steps for Windows users (Click Here)
1. Download Composer from https://getcomposer.org/download/and install it.
2. After installation, you should check whether its installed globally or not. Open command Prompt and enter command “composer” just like shown below.
3. Run `composer` to verify whether it installed successfully globally or not as shown below.

4. Place ~/.composer/vendor/bin directory path in your environment variable PATH
5. Now create a new project by using composer
For our example , Execute –
composer create-project laravel/laravel todolist
5. Execute below command to redirect to the new project
cd todolist
2. Exploring Directory Structure
Laravel applications follow the Model-View-Controller architecture design pattern.

-
Models represents the entities in database and helps you to query the database and return the data
-
Views are the pages which will be displayed when accessed the app. View Component is used for the User Interface of the application.
-
Controllers handle user requests, gets required data from the models and pass them to the Views. Controllers acts as an intermediary between Model and View Components to process the business logic and incoming request
When you installed composer, and created your first Laravel web app, you might have noticed the app folder with different files and folders. I know if you are beginner, you may have a lot of questions about what are these folders for etc. etc.
Let’s understand some

-
App: This directory is the meat of the application and contains the core code.
-
Console: This directory contains all the custom Artisan commands created using make:command
-
Exceptions:This directory contains the application’s exception handler and is a good place to add custom exception classes to handle different exceptions thrown by your application
-
Http: This directory contains all your controllers, middleware and requests
-
Models This is a new director added since Laravel 8 to hold Model files. Earlier, models were stored at App folder, but now it can be stored inside App/Models folders too.
-
Providers: This directory contains all your service providers for the application. You can know more about service providers here
-
Bootstrap: This directory contains framework bootstrap as well as configuration files. It also contains Cache directory which contains framework generated cache files
-
Config: This directory contains all your application’s configuration files.
-
Database: This directory contains all database migrations, seeds and factories. You can also store SQLite database file here
-
Public: This directory contains assets like images, js files and CSS.
-
Resources: This directory contains all view files and CSS or LESS or SASS files. It also contains lang directory to store language files.
-
Routes: This directory contains all routes definitions for the application. php is the file which receives all the requests to your application and here you can redirect the requests to their respective controller methods.
-
Storage: This directory contains blade templates, session files, cache files and other.
-
Tests: This directory contains all the test files
-
Vendor: This directory contains all composer dependencies
3. Configure and setup the Database
We need database for our application, so it’s best to configure our database before doing anything. Laravel supports following 4 databases −
-
MySQL
-
Postgres
-
SQLite
-
SQL Server
For this example, we'll be using a local MySQL database. The easiest way to get MySQL is by using phpMyAdmin which you can get from third-party products like XAMPP.
3.1. install XAMPP
Steps to install XAMPP for Mac
- Go to Apache Friends and download XAMPP for OS X
- Open the installer, You'll see the install window, while it gets everything ready
- Click "Open" on the warning box.
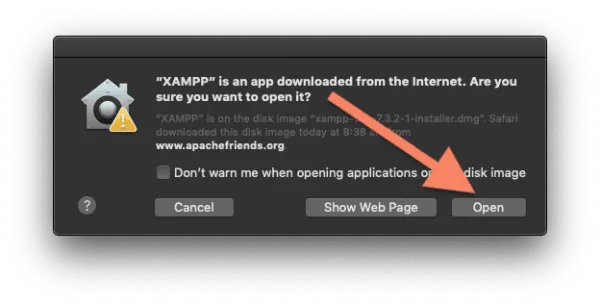
You'll probably have to put in your computer password to allow XAMPP to install.
- Now we get to the setup. Click "Next" to start the process
- Leave the default options selected. Click "Next".
- XAMPP will be installed to a folder in your Applications directory. Click "Next"
- Clear the Learn more about Bitnami for XAMPP option. Click the Next button.
Now everything's ready to go, click "Next" again.
XAMPP will install to your computer. Just let it run.
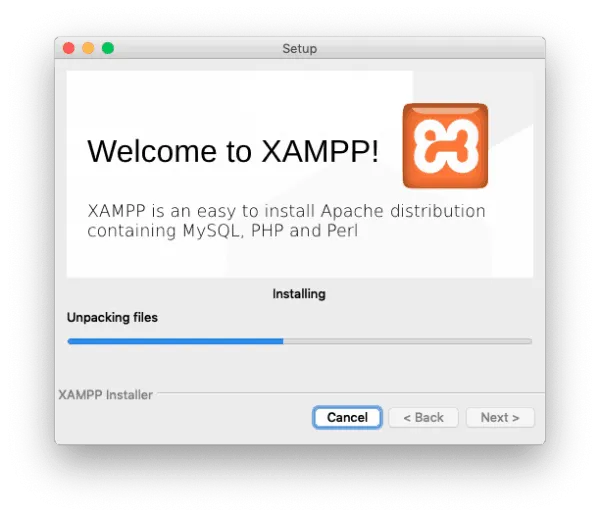
If all goes well, you'll see an installation confirmation.
Make sure Launch XAMPP is checked, then click "Finish".
Steps to install XAMPP for Windows
1. Open XAMPP website
2. Click Download XAMPP for Windows.
3. Open the installer, on the popped window, Click on Next
4. XAMPP offers a variety of components that you can install, our purpose is the database, so make sure to select both MySQL & phpMyAdmin then Click on Next

5. Use the default installed location. (Or choose another folder to install the software in the “Select a folder” field). Again click the Next button
6. Select the language for the XAMPP Control Panel.
7. Click the Next button.
8. Clear the Learn more about Bitnami for XAMPP option.
9. Click the Next button.
10. Click the Next button again.
11. Click the Allow access button to allow the app through the Windows Firewall (if applicable).
12. Click the Finish button.
Once you complete the steps Once you complete the steps, the XAMPP Control Panel includes three main sections. In the Modules section, you’ll find all the web services available. You can start each service by clicking the Start button.
To access phpMyAdmin on the web browser, you will need to start both MYSQL & Apache, by default Apache uses TCP/IP port 80 and 443, while MySQL uses TCP/IP port 3306.

3.2. Change the default MySQL password
It's not the best idea to have a blank password for database access, even if it's only on your own computer. It's pretty easy to change the default MySQL password.
1. Go to http://localhost/dashboard/, On the top right click on phpMyAdmin then Choose the User accounts tab, Look for the root user, then click Edit privileges.
2. click change password, Then enter a password into the Enter and Re-type fields, then click "Go".

~/xampp/phpMyAdmin/config.inc.php and set your password to the password you gave to the user root in:$cfg['Servers'][$i]['password']='YOUR_PASSWORD';4. Final step, to make sure the password change takes effect, go to the XAMPP control, select MySQL Database and click "Restart". 3.3. Create a database in phpMyAdmin
-
Click on the ‘Databases‘ tab;
-
Specify a Database name. in this example i set it as 'todolist';
-
Click ‘Create‘ button and you are done.
3.4. Setting up Database
Laravel provides config/database.php to config database but it's better not to store database credentials there instead you can use .env file where you can different types of credentials and other data.
Laravel comes with default .env file at root.
In the file you will find code like below:
DB_CONNECTION=mysql
DB_HOST=127.0.0.1
DB_PORT=3306
DB_DATABASE=homestead
DB_USERNAME=homestead
DB_PASSWORD=secret
Replace the above values with the values you specified on phpmyadmin. also change the DB_HOST to localhost
DB_CONNECTION=mysql
DB_HOST=localhost
DB_PORT=3306
DB_DATABASE=todolist
DB_USERNAME=root
DB_PASSWORD=pass
3.5. design the database
First step in developing any web application is to design the database.
Starting with our database tables we’d normally write SQL queries to create or modify a table but in Laravel, we will use migrations.
Migrations
A migration is a neat way of specifying your table structure without
bothering writing a bunch of SQL queries. Even more, migrations work a
little like Git as it allows you to make incremental changes, roll back
changes, and also keep the database structure in sync when multiple
teams are working on the same application.
Any cretaed migration will placed in your database/migrations directory. Each migration file name contains a timestamp which allows Laravel to determine the order of the migrations. as shown below.

As you can see, there are by default three migrations files. One of them is User migration, which comes with the essential columns that you'll need, so we're going to keep the table as it is. in case you want to add or remove a column check the following articles..
How to add new column in Laravel's default Users table
How to Remove Column or Multiple Column from Table in Laravel Migration?
Now Let's see the content of a migration file..

There are two methods up() and down(). up() is always associated with making new tables or fields in the database. The down() method is there to undo, or rollback, whatever the up() method does. A single table can have many migration files that run chronologically
to make it whatever you want it to be. As long as you implement the up and down method properly you should be fine.
As seen above, migrations are a way easier way of managing database structuring than doing it manually. Now let's make task table by creating it migration file.
You may use php artisan make:migration create_tasks_table command to generate a database migration. But for now, we won't create a migration until we learn about the Models, Controllers and factories
Eloquent Models
Eloquent is Laravel’s ORM which provides simple Active-record Implementation for working with database, and Model is a class that represents the logical structure and relationship of underlying data table. In Laravel, each of the database table has a corresponding “Model” that allow us to interact with that table. Models gives you the way to retrieve, insert, and update information into your data table..
Don’t worry if you find this explanation confusing. Believe me, you will get your way soon. Just follow along.
So to make a model for a table you can use: php artisan make:model task
You will find your newly created migration in /app/Models folder –
Factories
Laravel has a feature called model factories that allows you to build fake data for your models.
To create a factory, execute the Artisan command php artisan make:factory taskFactory
The new factory class will be placed in your database/factories directory.
Controllers
Controllers are used to direct
traffic between views and models and they can group multiple request
handling logic into a single class. Thus, generally they receive all the
request and based on their logic, they redirect or return respective
data. In our example, now we are moving towards front-end, thus we
should make controllers through which we can handle requests coming to
our application. To create controller you can use: php artisan make:controller taskController . This will create TasksController and you can find that in app/Http/Controllers directory.
Well, the four command above can be combined into one. So if you run a command like this:
php artisan make:model task -mfc
It will create a model with migration, factory and controller files automatically for you. The magic is in the -mfc parameter.
Now let’s add more columns to tasks table by editing the newly created migration file.
The new column named “description” will store the task description and column named “user_id” will store the id of the user who created the task. The add rules after the “user_id” are used to specifies that the child data “task” gets deleted when the parent data “user” is deleted. and the foreign key means that it is a reference to a column on another table “user”. and status column to specify if the task is completed or not
Here comes one of the roles of model which is to set all those fields of table which can be filled using mass-assignment that send an array called $fillable to the model to directly create a new record in Database. so the array in our example should be somthing like this
Task Model (task.php found in app/Models/task.php):
One-to-many
relationship
The other rule of Models is to set the relationships between tables. Eloquent provides way to connect their models through eloquent relationships. One-to-many relationship means when one model owns multiple amounts of another model.
For our example: single user can have many tasks thus one-to-many relationship exists between User table and Task Table. It's very easy to define and use Eloquent relationship and the benefit is, you don’t have to run query at all. Eloquent will bind the models so you will have to only use functions. Now let’s edit Task Model and User Model to create Eloquent Relationship
Task Model (task.php found in app/Models/task.php):
Add the following function, The meaning is each task blongs to a user
Then add the following class on the top to reference user model
User Model (user.php found in app/Models/user.php):
Again add the following function, The meaning is each user has many tasks
Don't forget to import the class..
Now We finished creating the database schema. To use this schema to
create tables in the database, execute below command. Make sure you have TERMINAL in your project directory
php artisan migrate
Once we migrate, the changes made in schema will update to the actual database

3. Styling the layout
Views – Blade Templates
The view is what’s presented to the users. This is how users interact with our application, from the buttons, text fields and so on. The view is mostly made up of HTML and CSS.
In Laravel, views are blade templates.
Blade is an amazing templating engine that makes it easy to work with
variables passed on to the view. This templating syntax is easy to learn
and pick up. With Blade, the need to use PHP in your views is reduced
to zero. The views are stored in the resources/views directory.
Laravel officially doesn't have any Artisan cammands for views, so we need to create the following views simply by add new file with the type .blade.php :

As you can see, I've split views into folders, just to organize
For authentication, we will need two pages, one for login and the other for registration, also we've the master-page which is completely optional to define content that will be shared by all pages on the website, such as a header, navigation menu or footer. index.blade.php which is the dashboard shows the task list
To be continued..


Comments
Post a Comment